
Introduction to Connect
Drivly Connect allows you to link all of your automotive data and systems to Drivly and enable you to access these systems via the Drivly APIs in three easy steps:- Select a data or service provider
- Sign in
- Give consent
In the Sandbox testing environment, Connect’s requirement can be optionally bypassed for testing purposes via
/sandbox/public_token/create.Connect Flow Overview
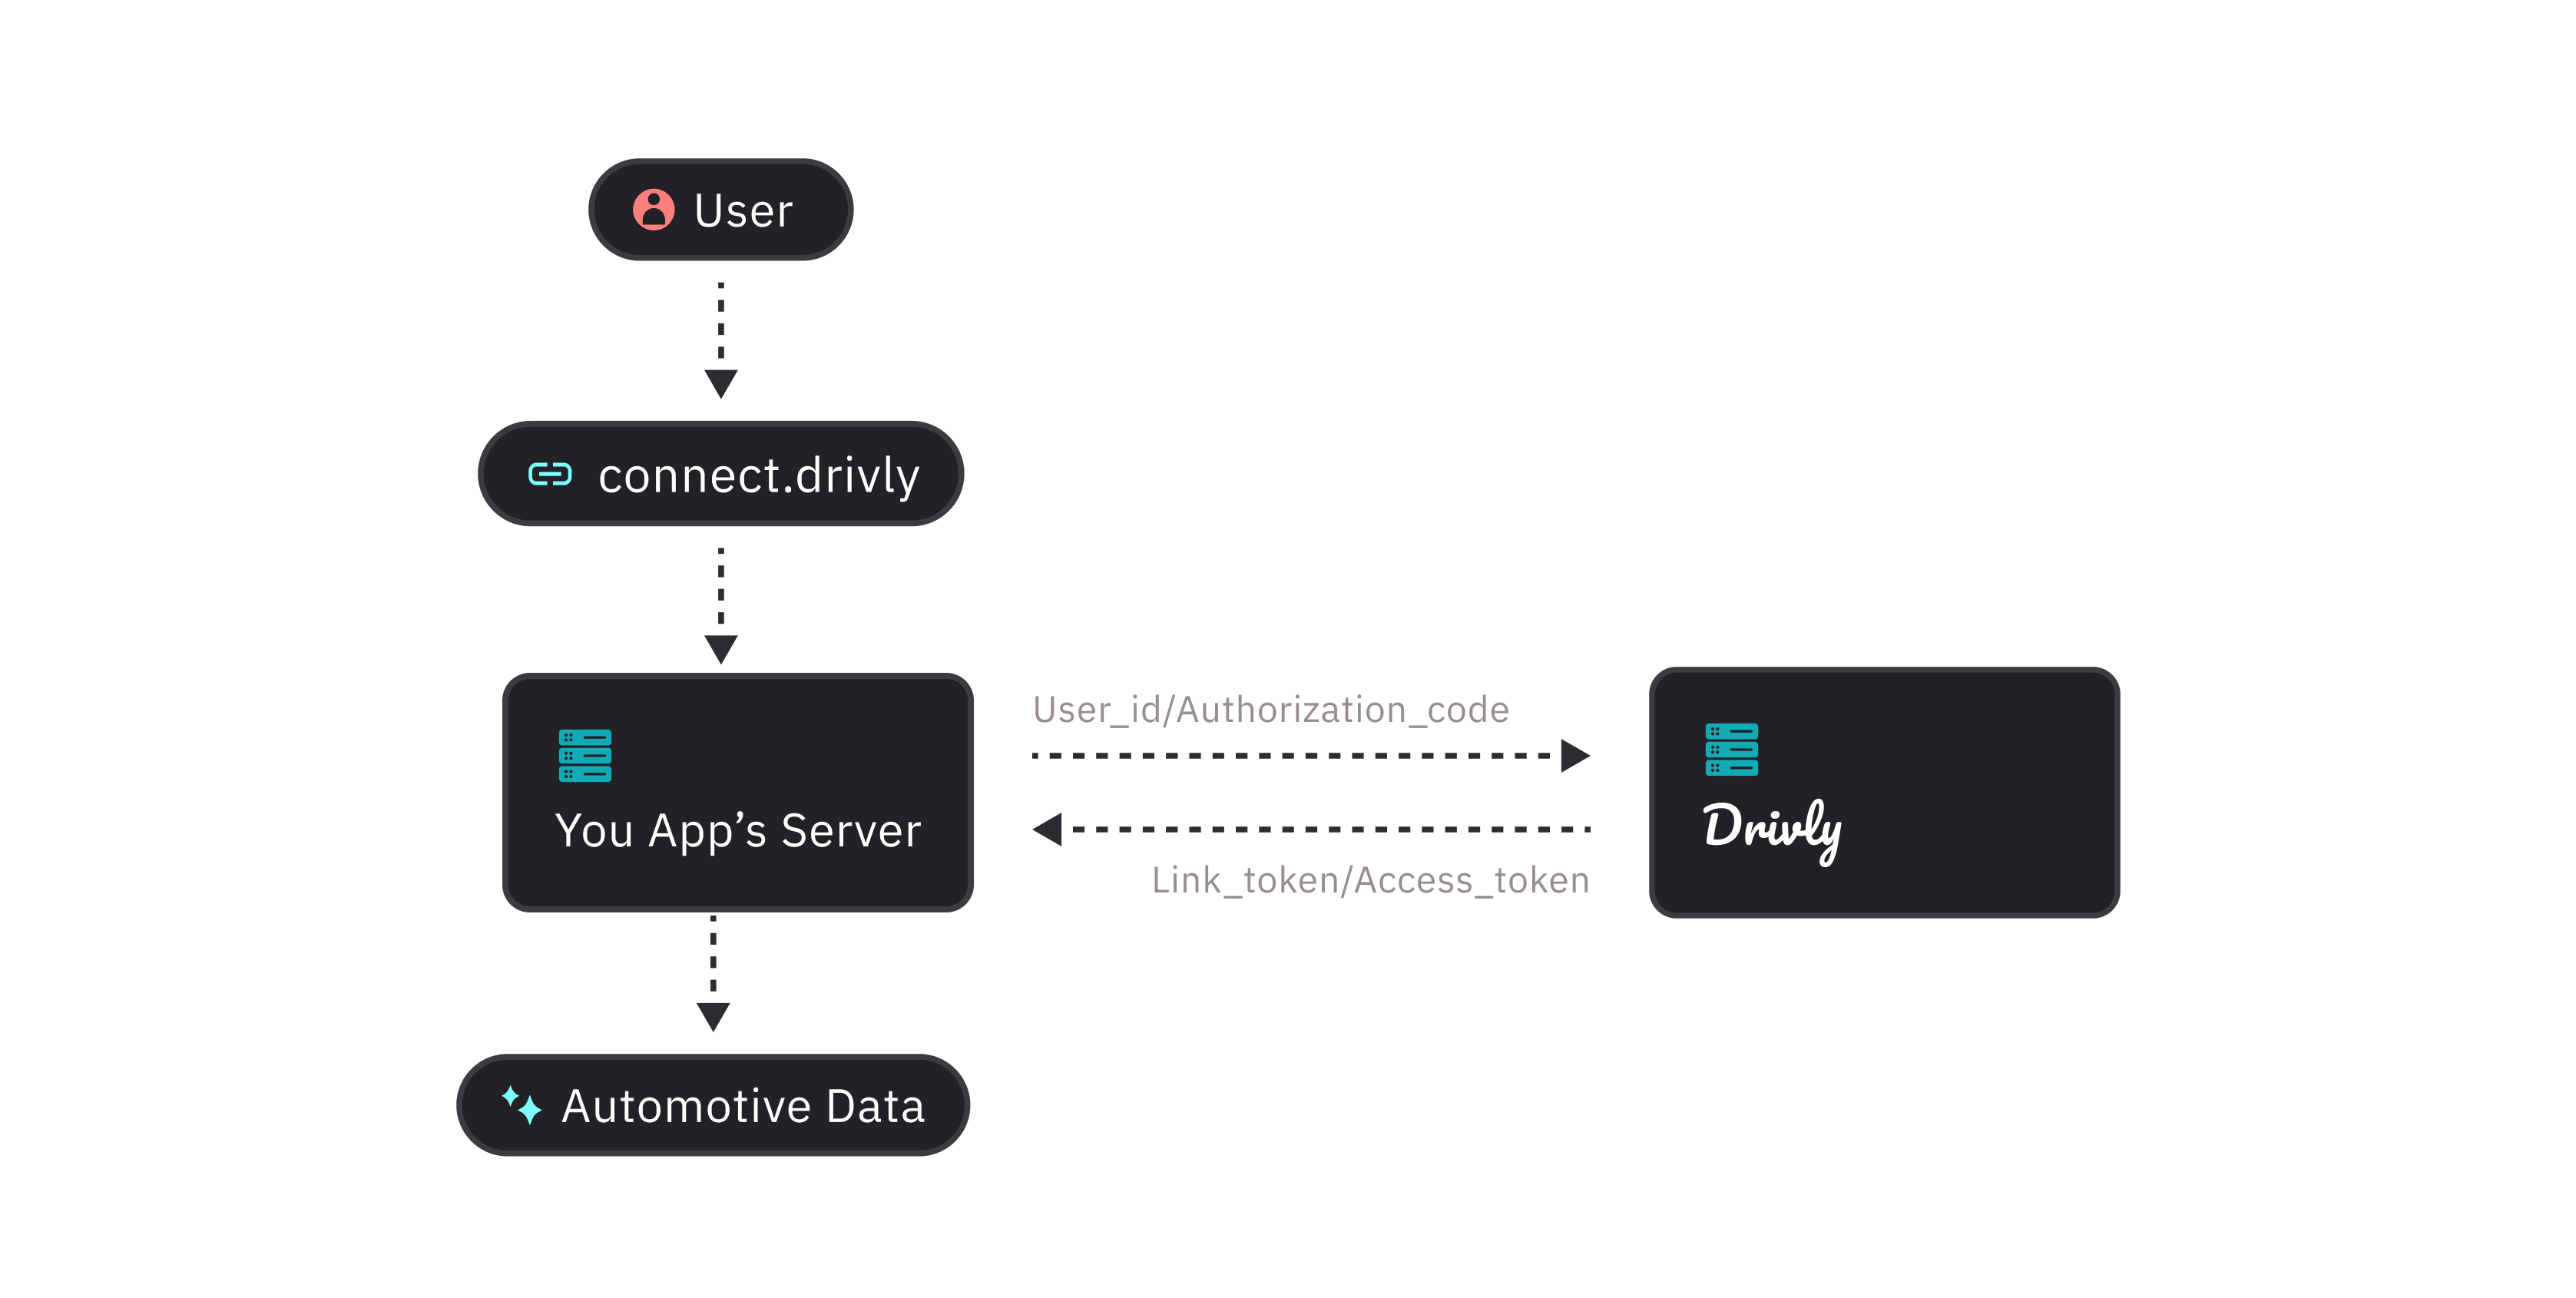
The Drivly Connect flow starts when a user wants to connect an exsisting data or service provider to their Drivly account. An overview of the process can be found below. To start integrating Drivly Connect make sure you have yourapi_key from your dashboard.
Before initialising the link flow, ensure you have generated a user_id for the specific user. This should be done when a user signs up to your service and is to be stored alongside your user entry in your database. See for more details on how to create a user_id.
-
To launch Drivly Connect, first generate a
link_tokenby passing theuser_idto the/link/tokenendpoint. -
Pass the
link_tokeninto the Vital link component to open the link for the user. Please note: thelink_tokenis a short-lived one-time use token. -
Use the
onSuccess,onError,onExitcallbacks to handle different events on your frontend.
Integration & Authentication
Automotive data and service providers have different authentication flows. Some require a username and password, SSO, while others require an email address and password. Drivly supports the following provider types:Google,Microsoft, andGitHubOAuthEmailEmail + Password
View the full list of supported data and service providers here. Don’t see one you need? That’s ok! You can recommend them here. We’re actively adding providers to the Drivly ecosystem so your input is helpful.
Connect Customization
You may want to add your own custom branding to your Drivly Connect flow to match your product UI. This is useful for users who have products that work directly with their customer accounts and want to use the Drivly API ecosystem.
JPG or PNG (1MB max), and for button colors we accept HEX, RGB, and HSL values.
For more details, see how to Build a Custom Link.